We all like to be liked. Some of us need to be liked a little bit too much, but I’m going to spare you my psycho-analysis. Instead let’s talk about how you can be liked on Facebook.
The Facebook Like Button Plugin
So if you’re creating good content there will come a time when your readers will want to like you or even share your stuff on their Facebook profile. Well that’s swell cause it’s simple to add a like/share button, like the one shown here, to your OutLoudBlogs.com blog.
The Facebook Like Plugin is optional so it requires you to choose some options before it’s activated.
Activating The Facebook Like Button
- Sign in and go to to your blog’s dashboard
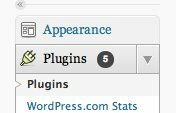
- Go the Plugins Menu select Plugins

- Activate the Facebook Like Plugin
- Scroll down past the Settings menu and open the “Facebook Like” menu
- Select Like Button and the General Settings box will appear on the right
-
NOTE: If you just want the basic button without getting demographic stats about those who click then skip to step #8
- The Facebook Like button plugin can be integrated with iFrame tags or XFBML tags.
- XFBML stands for Extended Facebook Markup Language, using this will allow users to add a comment when they like your page. In the future Facebook will be adding much more functionality by way of XFBML so it’s a good idea to click the ‘Don’t Have One?” link and follow the simple the instructions at Facebook.
- Or you can select iFrame for Type, but be aware that iFrame may not look right or appear in all browsers
- If you’ve got your App ID from Facebook enter it into the AppID for XFBML version box. The App ID will allow you to see stats about your clickers on Facebook.
- Next, select where you would like the button to appear: Home, Pages, Posts, Category and/or Archives.
-
- In relation to your content select where the button should be positioned: After, Before, or Before and After. NOTE: The manual selection is for those who want to use short codes to display the like button on an individual post.
-
- Select the alignment of the button: Left, Right or None.
-
- If you chose the iFrame type in step 4 skip the Admin ID box
-
- Click Save Settings.
Your button is now activated, but you may want to apply some layout settings to your button.
Layout Settings For The Facebook Like Plugin
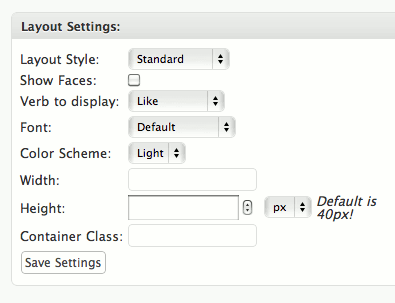
Below the General Settings box is another box labeled Layout Settings

- Select Layout Style: Standard, Count Button or Count Box. NOTE: You can preview any of your layout changes in the Live Preview box above the General Settings box.
- Choose whether you’d like to Show Faces of those who’ve liked your posts — displays their Facebook profile photo
-
- Choose your Verb, Font, Color Scheme and Width
- The default height of the Like Button is set at 40px. If you leave it at 40px there may be quite a bit of empty white space at the end of your post. Enter 25 in the Height box.
-
- Skip the Container Class field and click Save Settings.
Presto! You’re done. You can change the settings and layout as often as you “like”. Haha, get it?


 Site Wide Posts Feed
 Site Wide Posts
2 Comments in this post »
RSS feed for comments on this post.
odd. I don’t have a Plugins option under Appearance.
Tdub,
I can’t find your blog in our system. Log in and select ‘My Blogs’ -> ‘Create a Blog!’ from the menu bar at the very top. Follow the steps, and if that doesn’t work let me know and I’ll create one manually for you. I’ll also email this response to you. Thanks.
Ricky